With an admin/manager access right, you can attach a file and add the issued and expiry dates of an item set in a Worker or an Equipment passport either in the Tracking table or the Passport.
For worker passport items, workers can be granted access to self-update their Passports, but an admin/manager user will need to approve the submitted documents and dates.
For contractor passport items, files and dates can only by added by the contractor an admin/manager user will need to approve the submitted documents and dates.
From the Tracking table
Left menu: Workers or Equipment ⇒ Top sub-menu: Tracking
- Click on the table selection button to select if you want to update Requirements or Other Items.
- The table opens by default on the Requirement table

- In the table, find the worker’s requirement you want to update..
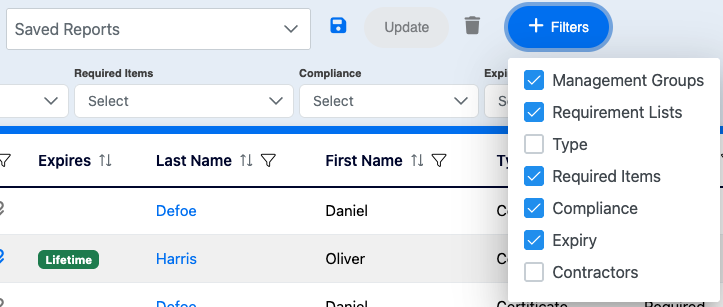
- You can use the advanced filters to have a selected view of your table.
- You select the filters you want by clicking on the +Filters blue button.
- You can save your filtered view for a quick future access by clicking on the blue disk icon to the right of the Saved Reports dropdown list.
- Click the requirement / item to open its updating window.
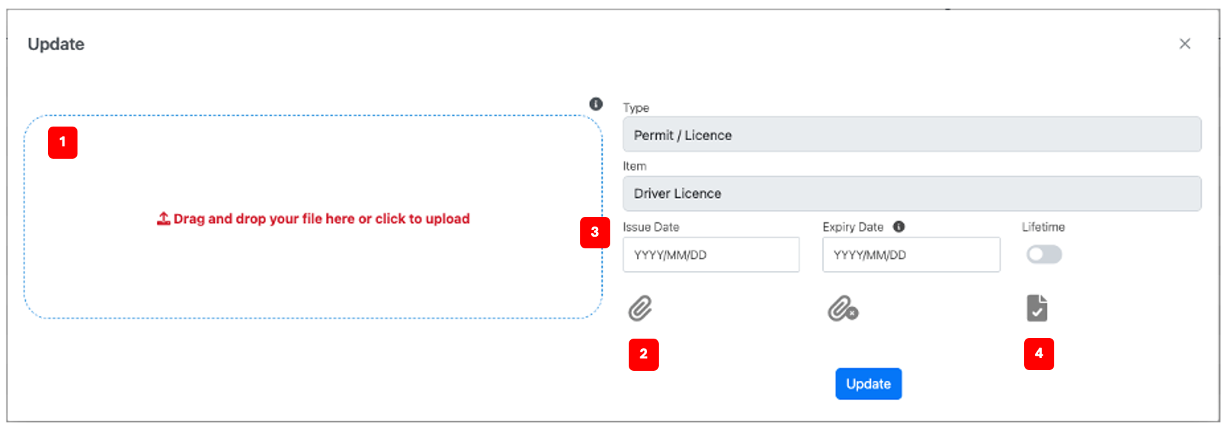
- Attach your document by dragging and dropping the file in the dotted line zone 1️⃣ or click in the zone to open a file selection window.
- See the attached document by clicking the blue paper clip 2️⃣ to ensure that it is the right one or to consult the issue and expiry dates (you can delete the attached file by clicking the red paper clip (the right one mark with an X).
- Add the Issue and Expiry Dates 3️⃣.
- If the document has a pre-set validity period, the expiry date will be automatically calculated once you enter the issue date.
- If no expiry date applies, flicker on the Lifetime button.
- Click the Pre-Approved icon 4️⃣ to approve immediately the updating.
- If not, the updated requirement / item will have a Pending Approval status (yellow dot) and will appear in your Approval table until approved.
- Click the Update blue button to save your changes.
From a Passport
Left menu: Workers or Equipment ⇒ Top sub-menu: Passports
- Click the selected worker / equipment to open the Passport
- Click the requirement / item to open its updating window.
- Attach your document by dragging and dropping the file in the dotted line zone 1️⃣ or click in the zone to open a file selection window.
- See the attached document by clicking the blue paper clip 2️⃣ to ensure that it is the right one or to consult the issue and expiry dates (you can delete the attached file by clicking the red paper clip (the right one mark with an X).
- Add the Issue and Expiry Dates 3️⃣.
- If the document has a pre-set validity period, the expiry date will be automatically calculated once you enter the issue date.
- If no expiry date applies, flicker on the Lifetime button.
- Click the Pre-Approved icon 4️⃣ to approve immediately the updating.
- If not, the updated requirement / item will have a Pending Approval status (yellow dot) and will appear in your Approval table until approved.
- Click the Update blue button to save your changes.
💡 Good to know
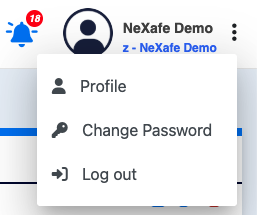
- Users with Admin access can access their Passport in Edit mode when logged in the platform by clicking on the 3-dots icon to the right of their name and selecting Profile.
Related Topics