To add a piece of equipment to your management list, you need to create its Passport and to identify it, have created beforehand its Type and Brand in their respective master lists.
Left menu: Equipment ⇒ Top sub-menu: Passports
- Click the blue + Equipment button at the top of the window.
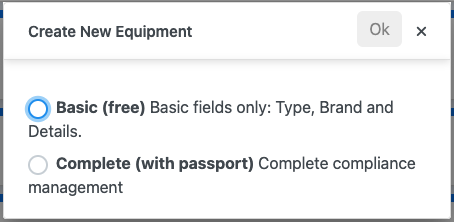
- Then select the Passport status in the pop-up window.
- Basic: is free and allows to list the equipment but not add documents, forms, and advanced information.
- Complete: ($) allows for full management.
- Then select the Passport status in the pop-up window.
- In the Equipment Passport click the Edit blue button to activate the edit mode (yellow windows vs blue in view mode).

- Select a type (see below how to add types to your type master list).
- Select brand (see below how to add types to your type master list).
- Add an Equipment ID (optional).
- The system generate a number by default.
- If you enter an ID, yours will prime over the NeXafe generated ID.
- Add specific details to personalize your equipment identification (optional).
At this point, you can choose to click the Save blue button to create your Equipment Passport (final step for Basic Passports) or add the following information (for complete Passports).
- In the top window:
- A photo of the equipment by clicking the black square with the wrench icon.
- Click the blue Note button to add the note.

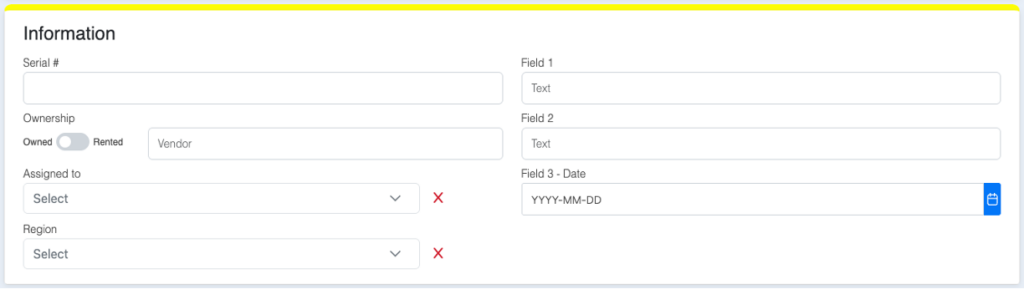
- In the Information window:
- The serial number.
- The rental company if the equipment is rented.
- The user to which the equipment is assigned.
- The location (must be created in your location list).
- Other in information of choice in the 3 custom fields.elect brand (see below how to add types to your type master list).
- In the Management Groups window:
- Click the Assign/Remove blue button to assign the equipment to a group.
- See below the link to create and manage Management Groups.

- Click the Save blue button to register your information.
The Passport is now in consulting mode (blue windows).
- To modify or add information, click the Edit blue button at the top..
- Click the Exit icon at the top right of the window to close the tab and go back to your Passport table.
- In your Passport table, click the Refresh blue icon to show immediately the new Passport in the list.
Add a Type to your Type list
Left menu: Equipment ⇒ Top sub-menu: Types
- Click the blue + Type button at the top of the window to open creation/updating window.
- Add a title.
- The French version is optional and will only show up if a user as French as its selected language.
- Click the Save to register your information and exit.
Add a Brand to your Brand list
Left menu: Equipment ⇒ Top sub-menu: Brands
- Click the blue + Brand button at the top of the window to open creation/updating window.
- Add a brand name.
- Click the Save to register your information and exit.
💡 Good to know
- You can add multiple equipment at once by batch importing them using an Excel file.
- Learn how to batch import multiple equipment.
Related Topics