Projects allows to create a subset of contractors and requirements to manage contractor compliance within limited scope. You can designate a leader for the project and archive the required documents of all contractors assigned to the projects to show compliance at for a given period.
Left menu: Home ⇒ Top sub-menu: Projects
To create a project
- Click the +Project blue button.
- Name your project, select the lead user, and click Save to open the project management window.
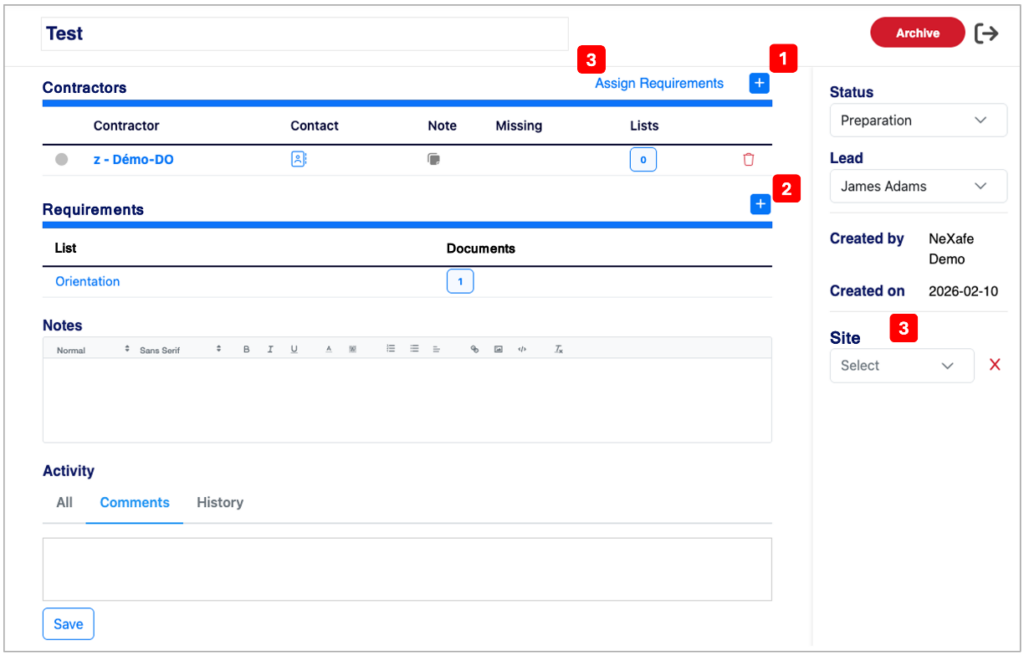
- To add contractors to your project, click the + blue button 1️⃣ in the Contractors section.
- To Add requirements to your project, you need to select a list by clicking the + blue button 2️⃣ in the Requirements section.
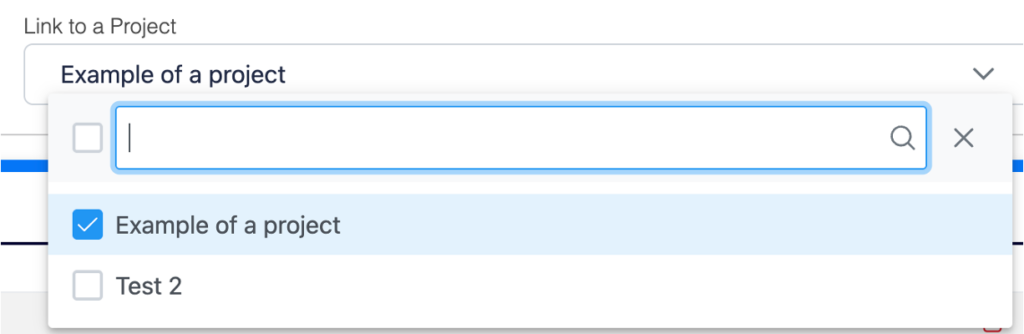
- To delete requirements from your list of requirements, click on the List to open the List management window then uncheck the project in the Link to a project list (under the French Description zone.
- To assign requirements to contractors, click on Assign Requirements 3️⃣ in the Contractors section.
- You can also:
- Modify your Project name.
- Set the status (Preparation / In Progress / Closed).
- Assign a different project leader.
- Associate a site (roll down list is your listed sites – see below how to add sites to site list).
To archive a project
- Click on the red Archive button and confirm.
- All documents and data will be consolidated in PDF.
- The project will no longer be visible in your main dashboard but will remain accessible in your archives (Archives blue button in your Projects tab).
💡 Good to know
- We recommend creating requirement lists specific to each of your projects so that you can separate a subcontractor’s project-specific compliance status from their general status. You can create requirement lists from scratch or by cloning an existing list. Requirements included in multiple lists are requested from a subcontractor only once, even if those lists are assigned to them.
Related Topics