You can add all your compliance documents to your Passport, even if they are not yet required by a client. When one or more clients will require the documents, they will be shared automatically and you will have nothing to do.
Left menu: Contractors ⇒ Top sub-menu: Our Passport
- Click on the blue + Documents button at the top of the window.
- Select a document (or several) from the list and click the Save button.
- The added document(s) will be added in the right Other Documents list.
- Click the newly added document to open the updating window.
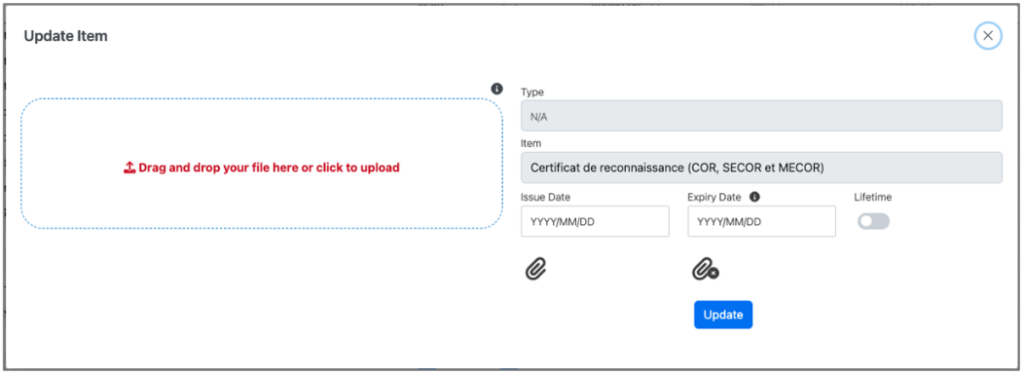
- Attach your document by dragging and dropping the file in the dotted line zone or click in the zone to open a file selection window.
- See the attached document by clicking the blue paper clip (the left one) to ensure that it is the right one or to consult the issue and expiry dates (you can delete the attached file by clicking the red paper clip (the right one mark with an X).
- Add the Issue Date and the Expiry Date.
- If the document has a pre-set validity period, the expiry date will be automatically calculated once you enter the issue date.
- If no expiry date applies, flicker on the Lifetime button.
- Click Update to save your changes.
💡 Good to know
- The system will send a notification when a document is about to expire based on the Expiry Date.